Do I need to buy hardware or screws?
1. Bracket Installation
Unwrap the blind, but leave all cords tied. To determine placement of blind, hold up to the window frame, either an outside mount or an inside mount will be desired. THE HEADRAIL MUST BE LEVEL! Once it is positioned properly, pencil a reference mark at each end of the headrail. This placement determines where and how the mounting brackets will be attached.
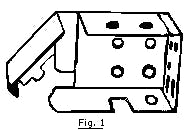
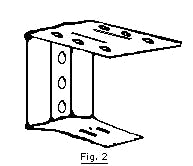
Right and Left mounting brackets (Fig. 1) are supplied with each blind. These brackets are used for all types of mounting (outside, inside, ceiling) Bracket doors must face inside the room. Depending on blind placement, it may be necessary to use plugs or anchors before using screws. Center support brackets (Fig. 2) may also be included to provide additional support on wider blinds. Center support brackets should be spread evenly along width of the blind. These brackets should not interfere with the cord or ladder. Be sure all brackets are level.
A. Inside Mount
Mount brackets at reference points that are flush and level with the window frame, and mark the screw holes with a pencil. Select diagonal (right top-left bottom) holes to assure a secure installation. If center support brackets are used, place evenly along width of blind. Position each bracket and mark holes with a pencil. Insert and tighten screws through all brackets, making sure all brackets are straight and level.
B. Outside Mount
With blind open, hold up to wall in the position you want it to hang. Make sure the blind is centered and level. Mark with a pencil a small mark below the headrail at each end, also mark 1/4" past the end of each headrail. Place end brackets inside pencil marks and mark screw hole positions in rear of bracket in a diagonal pattern. If center support brackets are used, place evenly along width of area blind is to be mounted and mark screw holes. Insert and tighten screw through all brackets, making sure all brackets are straight and level.
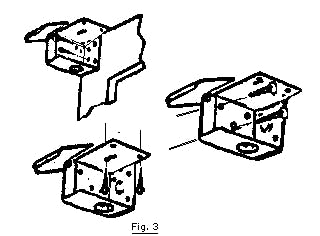
***Special Note 1" Aluminum Blinds Bracket Installation (Fig. 3) Follow instructions for wood blinds or 2" horizontal blinds as listed.
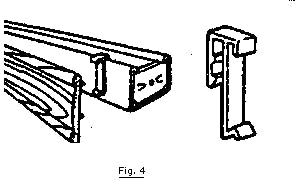
2. Valance Clip Installation
All blinds will receive valances and are installed with valance clips. Each type of blind will use a different type of clip, (Fig. 4) but installation onto the headrail will be the same. Attach enclosed valance clips to the face of the headrail. (Spread evenly across the headrail) This is all that is done until headrails is in place.
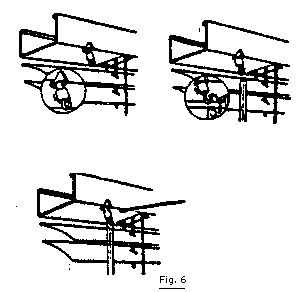
3. Wand Assembly Installation (Fig. 6)
(Does not apply for blinds with cord tilter) If your blind uses a wand assembly and it was not preattached, the wand should now be fastened to the tilt or shaft. Push plastic sleeve up. Slip wand onto hook. Pull sleeve down over hook to secure wand.
4. Mount The Blind
Release all cords at this time. With bracket door latches open on each end, slide headrail into mounting brackets and place on center supports (if used). Close down bracket door latches until they snap in place.
***Special Note If the blind has too much free play between the brackets, reopen the bracket door latches, remove the headrail, and bend out the tab on the end. Reinstall as before.
Follow instructions for wood blinds or 2" horizontal blinds as listed.
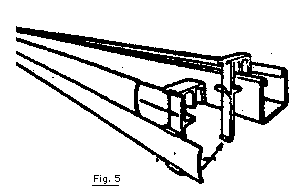
5. Install The Valance (Fig. 4 & 5)
Place valance at desired position on headrail. Put top part of valance in top part of valance clip first, than lightly push down to snap into place.
***Special Note On outside mount installation of 2" wood blind, valances will be mitered on each end and will have returns. The valance and returns will be slotted and attached at a 45 degree angle with one inch "L" brackets. Installation same as above.
6. Removing Blind
Remove valance then raise blind to top and lock. Open both bracket door latches and pull blind out.
7. Cord Leveling
If cords on your wood blinds are not at a desired level they can be shortened only. Slide tassel up exposing the knot, untie knot, pull cords to desired level, retie knot and slide tassel back down over knot. Cut off excess cord if desired.
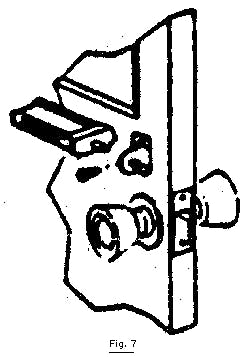
8. Hold down Brackets (Fig. 7)
If hold down brackets were requested they can be installed after blind has been hung. These brackets are used to keep the bottom of the blind from swaying when mounted on doors or exposed to the wind. Install bottom rail pins (Fig. 7) into wood bottom rail ends (2" Horizontal Vinyl Blinds & 1" Aluminum Mini Blinds come with special caps) in the center of the wood at the desired distance from the wall/door. Lower the blind to its full length, insert the brackets with the pins, mark the location of the screw holes on the mounting surface. Raise blind, install brackets, lower blinds to brackets and snap pins onto brackets.
9. Operating Instructions
To tilt slats, rotate wand to the right or left (blinds with cord tilter, pull right or left cord). To raise blind, pull cord downward and to the right. Blind will lock in desired height. To lower blind, gently pull cord toward left of blind until lock releases. Slowly let cord slip through fingers until blind reaches desired height. Move cord back toward right of blind and release. Blind will lock automatically. Important: Keep slats tilted open while raising and lowering.